Your character looks ready in a preview. Then you drop it into Godot: a white box follows it, the outline goes blurry, or its feet jump between frames. Another attractive export will not tell you whether those problems are fixed.
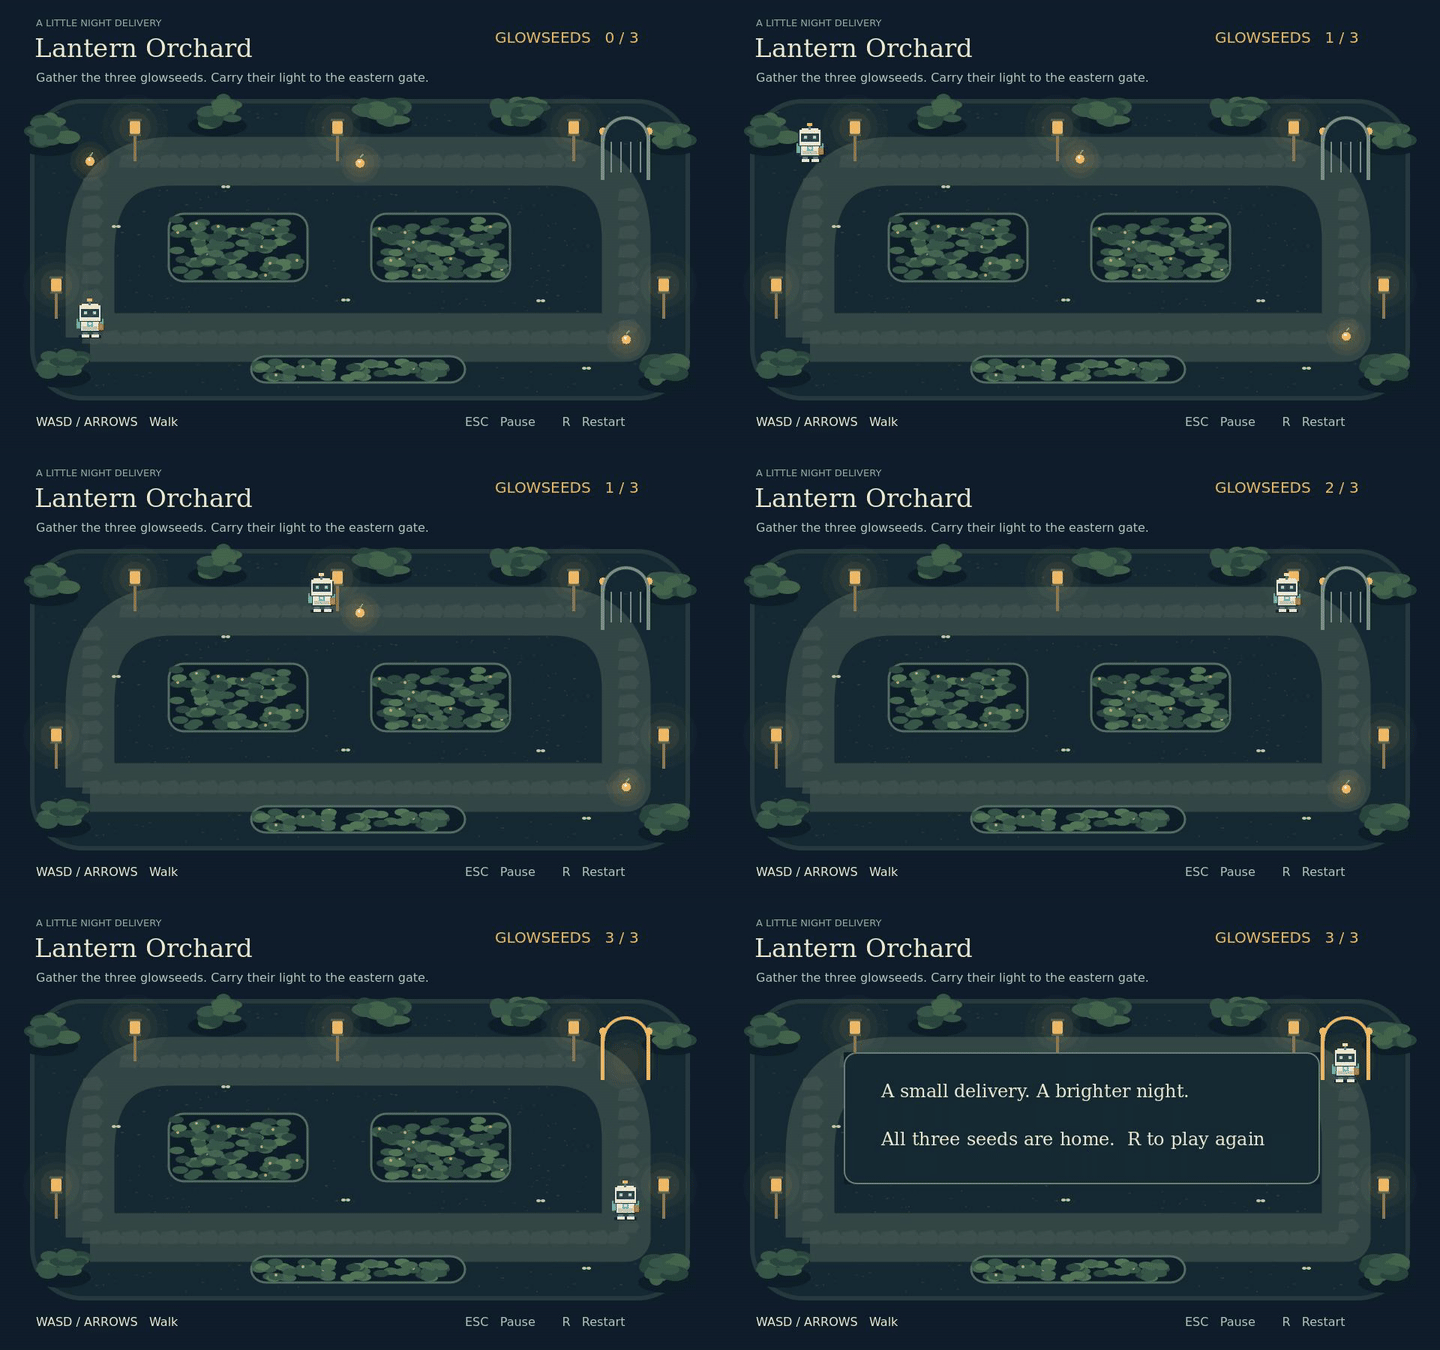
Test the sprite sheet in a small playable scene instead. Our downloadable Godot garden puts one four-frame character against light and dark backgrounds, with broken examples to compare. Use it to check your own artwork, then see how Voyager can reject a bad replacement while keeping the working sprite.
Download the Godot project and sprite fixtures.
Define the Godot sprite sheet dimensions and transparency
Start with the size the game actually needs. For this courier, that means four 64 × 64 frames in a 256 × 64 PNG, a transparent background and feet that stay on the same baseline.
Make a four-frame walking sprite strip for a small ivory courier robot
with teal details. Each frame is 64 × 64 pixels; the complete strip is
256 × 64. Keep the silhouette, palette and foot baseline consistent.
Use genuine transparency, with no painted checkerboard or solid background.
Show it walking in a Godot scene at its intended display size.
Treat that as a specification to check, not a guarantee from the model. Our example was drawn with code inside Voyager. The opaque version is an intentionally broken teaching fixture.
Check it where the player will see it
Open the project in Godot and use the arrow keys or WASD. Walk past both dark foliage and the pale path. That makes unwanted background pixels easier to spot than a transparency grid does.
For pixel art, set the receiving Sprite2D node's Texture Filter to Nearest. Linear filtering blends neighboring pixels; it can be useful for smooth artwork, but it softens this sprite. Use integer display scales when you want the pixels to remain evenly sized. Godot's image-import guide covers the import choices.
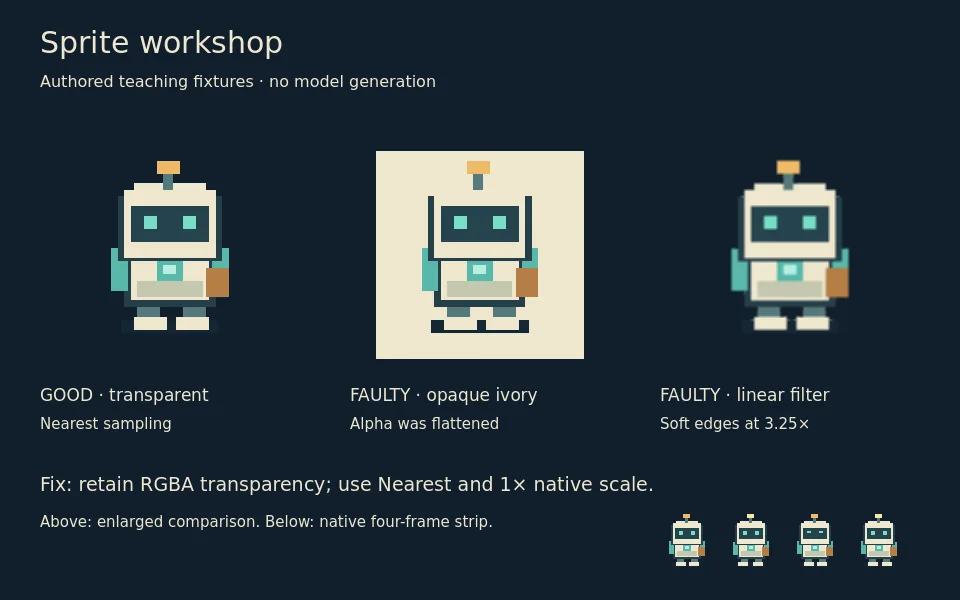
Then watch the animation. A valid PNG can still have inconsistent feet or a face that changes between frames. Check those visually; a successful import will not catch them.
Inspect this sprite in the running game. Check transparency, frame dimensions,
filtering and the foot baseline. Fix only the asset or its presentation;
keep movement speed, collisions and the collection rules unchanged.
Replace the art without losing the working version
This is where we took the example further in Voyager. Its game-asset workflow accepts an explicit contract: courier, image, 256 × 64, transparency required. The game loads the prepared texture from its asset catalog.
Preparing the unchanged source reused the existing asset. Submitting our opaque fixture against the transparency requirement failed, and the catalog stayed byte-for-byte unchanged. The game kept its previous working texture.
Prepare this as the courier asset: image, 256 × 64, transparency required.
Reuse the verified output if the source has not changed. Try the opaque
teaching fixture against the same contract, then confirm that rejection
leaves the previous catalog entry intact. Run the game with that entry.
The benefit is specific: a new attempt does not have to overwrite the version your scene already uses. You can do this with your own import scripts too; Voyager supplies the preparation, versioning and validation workflow.
Try it with your own character
Open project.godot, play the scene, then replace the source strip with your own character at the same dimensions. Keep the validation step and the in-game visual check. Neither replaces the other.
Collect all three seeds and walk to the gate. R restarts; Escape pauses. The source project runs in Godot without Voyager.
Before replacing a working sprite, check the PNG's dimensions and transparency, then watch it move at its actual game size. The first check catches invalid files; the second catches art that still looks wrong. Voyager can enforce the file requirements and preserve the accepted version while you make that visual judgment.
Make your next project in Voyager
Create an account, download Voyager, and start making.